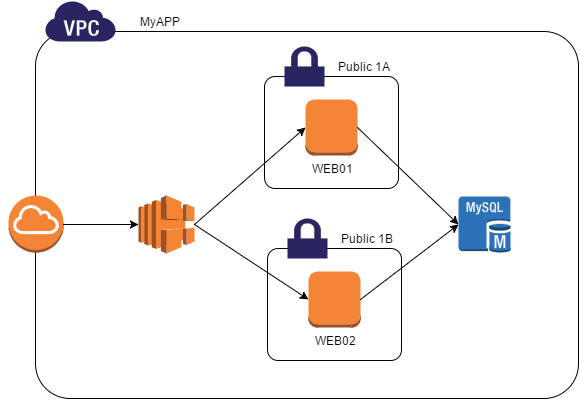
Creating VPC using Terraform and hosting WordPress web server and MySQL database
Table of contents
No headings in the article.

So let's get started !!
Step1 — Configure AWS in cmd line

Step 2 — Create a key pair for login into the EC2 instance

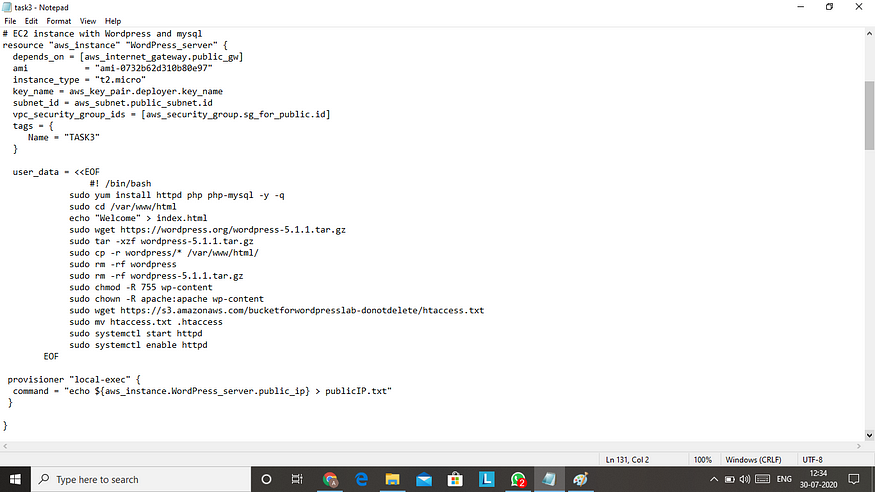
Step 3 — Create an instance with WordPress server and MySQL database server

in this instance, I have installed MySQL database using yum install.
Then I install WordPress .tar files using wget cmd and then unzip .tar files in /var/www/html folder
Then I change the mode of wp-content to read and execute to everyone and write for the owner as well using
cmd — chmod -R 755 wp-content
Then I change the owner of apache so that it can run on the apache server
Then I start httpd server
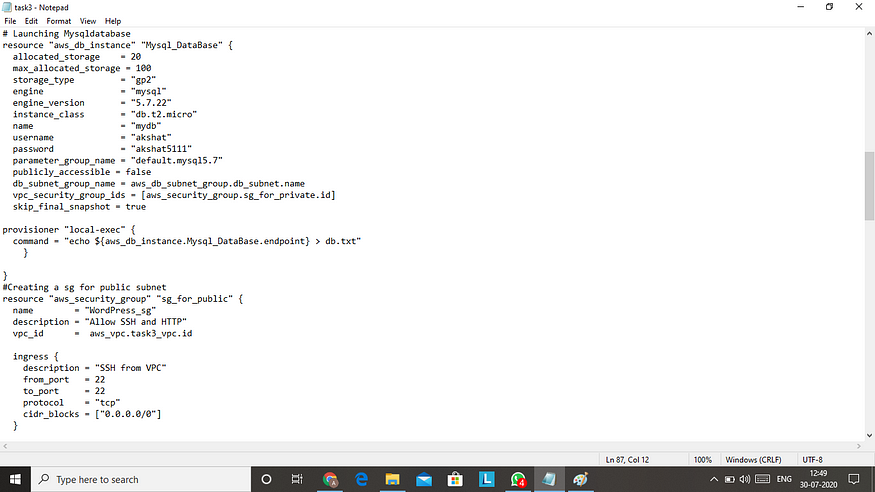
Then I launch MySQL database server

Step 4— Create a VPC(virtual private cloud)
# Creating a new VPC
*resource “aws_vpc” “task3_vpc” {
cidr_block = “192.168.0.0/16”
enable_dns_hostnames = true
tags = {
Name = “task3_vpc”
}
}*
Step 5— Then I created a public subnet for WordPress and a private subnet for MySQL database

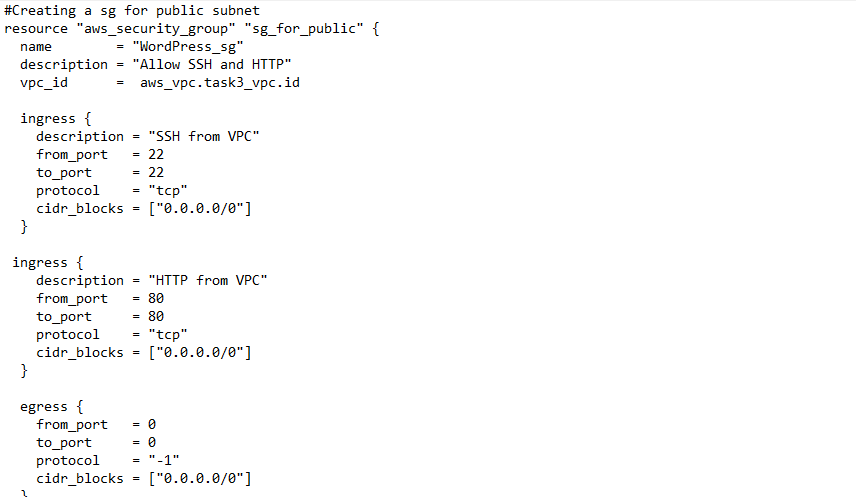
Step 6— Create a security group for the private and public subnet


Step 7— Create a database subnet group in vpc basically it is a collection of different private subnets for your database
*# Creating Private Subnet for database
resource “aws_subnet” “private_subnet” {
vpc_id = aws_vpc.task3_vpc.id
cidr_block = “192.168.6.0/24”
tags = {
Name = “private_subnet”
}
}*
Step 8— Create an internet gateway for outside connection with the internet
resource “aws_internet_gateway” “public_gw” {
vpc_id = aws_vpc.task3_vpc.id
tags = {
Name = “public_facing_internet_gateway”
}
}
Step 9— Create a router table for your internet gateway it is a set of rules called routes for your IP to show the way or their destination
# Creating a route table to go to Internet Gateway
resource “aws_default_route_table” “gw_router” {
default_route_table_id = aws_vpc.task3_vpc.default_route_table_id
route {
cidr_block = “0.0.0.0/0”
gateway_id = aws_internet_gateway.public_gw.id
}
tags = {
Name = “default router table”
}
}
Step 10— Now associate or add your public subnet with route table
resource “aws_route_table_association” “associate_subnet” {
subnet_id = aws_subnet.public_subnet.id
route_table_id = aws_default_route_table.gw_router.id
}
Now you are almost done just run two cmd
terraform init
terraform apply

After successfully a apply just copy the public IP of your instance from aws running instances and paste it on google and you will see wp famous login page like this

Now enter the same details as you mentioned while launching my sql database and complete the installation and have fun with it in my case in writing a blog

Thank you !!